Cat Claws: Nature Intended For Them To Be There
Excerpted from Do Unto Animals by Tracey Stewart (Artisan Books). Copyright © 2015. Illustrations by Lisel Ashlock
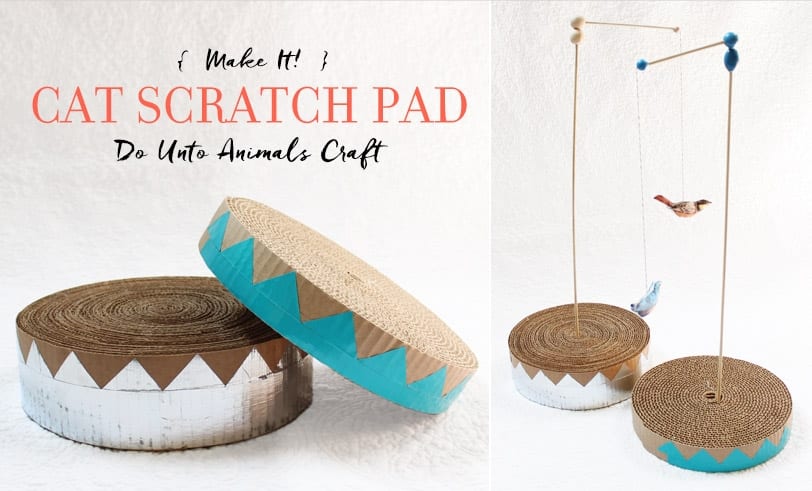
Puddin’ was surrendered to Animal Haven shelter for scratching her original guardian’s furniture. Due to my allergies, we weren’t able to adopt her, but my daughter made it her mission to find her a new home. She set Puddin’ up for success by supplying her with opportunities for letting her claws loose. She bought a simple cardboard scratch pad and decorated it with duct tape to personalize it just for Puddin’. It may be hard to understand, but cats really aren’t trying to drive you crazy by scratching your belongings.WHAT CAN WE DO?
As an alternative to declawing, house cats can be redirected from furniture to more desirable objects, like a scratching post or mat. These objects will satisfy a cat’s desire to use her claws and will help to file the claws down on a regular basis. Another great product is Soft Paws, little rubber nail caps that can easily be slipped onto your kitty’s claws. Soft Paws requires that the tip of the cat’s nail be trimmed just slightly to allow the cap to fit down to the base of the nail. Using a non-toxic adhesive, the nail caps are secured onto the paws, lasting 4 to 6 weeks and allowing kitty to scratch, stretch, and partake in all other natural behaviors without any damage.
** More information on cat claws and reasons to avoid declawing can be found in Do Unto Animals **
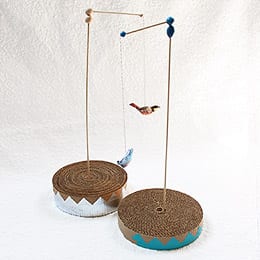
MAKE YOUR OWN CAT SCRATCHING PAD:
WHAT YOU NEED:
- Round cardboard scratching pad re-fills
(we used two re-fills to increase the height of the scratch pad) - Duct Tape
- Hanging bird cat teaser template
- Canvas material
- Polyester stuffing
- Needle and thread
- Straight pins
- Scissors
- Dowel
- Hot glue gun
1. STACK two scratch pad re-fills on top of one another. This will add to the height of the scratch pad. ATTACH the two pads together using duct tape.
2. CUT triangle shapes out of duct tape and STICK them along the scratch pad as decoration.
3. DOWNLOAD the hanging bird cat teaser template and PRINT onto canvas material. CHOOSE one of the birds to hang from your scratch pad. CUT the bird out of the material, leaving a 1-inch border around the image. Remember that there should be two identical images of the bird, a front side and a back.
4. PIN the front and back side of the bird together, with the bird image facing inward. SEW around the border of the fabric, leaving an opening large enough to fit two fingers for adding stuffing.
5. TURN the material right side out so that the image of the bird is visible and FILL the bird shape with stuffing. SEW the open edge closed.
6. STICK the dowel into the center of your scratch pad and GLUE in place. HANG the bird off the top of the dowel by poking string through the stuffed bird and knotting (or gluing) around the dowel.
* Want to make this scratch pad more exciting for your kitty? Add catnip to your stuffed bird or sprinkle it over the scratch pad!

