Make Nice Mission: Pollinator Placemat
The butterfly was one of Catherine Violet Hubbard’s favorite animals. Jenny, Catherine’s mom, remembers watching as “she would cup a butterfly in her tiny hands and whisper to it as it took flight.” She would tell the butterfly to let its friends know that she was kind so that they would come back. “Not surprisingly,” Jenny says, “we would be mesmerized by the flocks of butterflies that fluttered through our gardens.”
Butterflies are just one of the incredible animals that pollinate our backyard. As they land on flowers pollen attaches to their feet. Once they decide to take flight, the pollen drops off and spreads throughout the yard. This encourages the garden to grow. Other pollinators include bees, hummingbirds and bats.
Make Your Own Pollinator Placemat
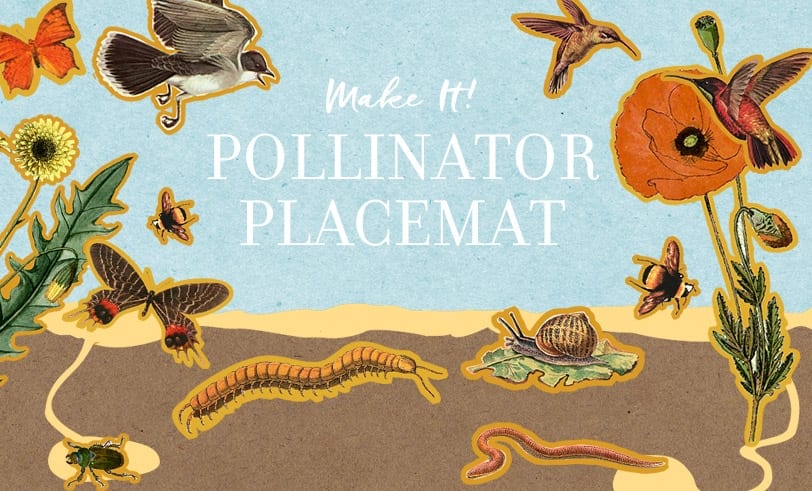
As part of our Make Nice Mission with the Catherine Violet Hubbard Animal Sanctuary, we created a Pollinator Placemat as an addition to their educational program. This placemat is to be shared with the children that visit the sanctuary, to teach them about pollinators and their importance in our yard.
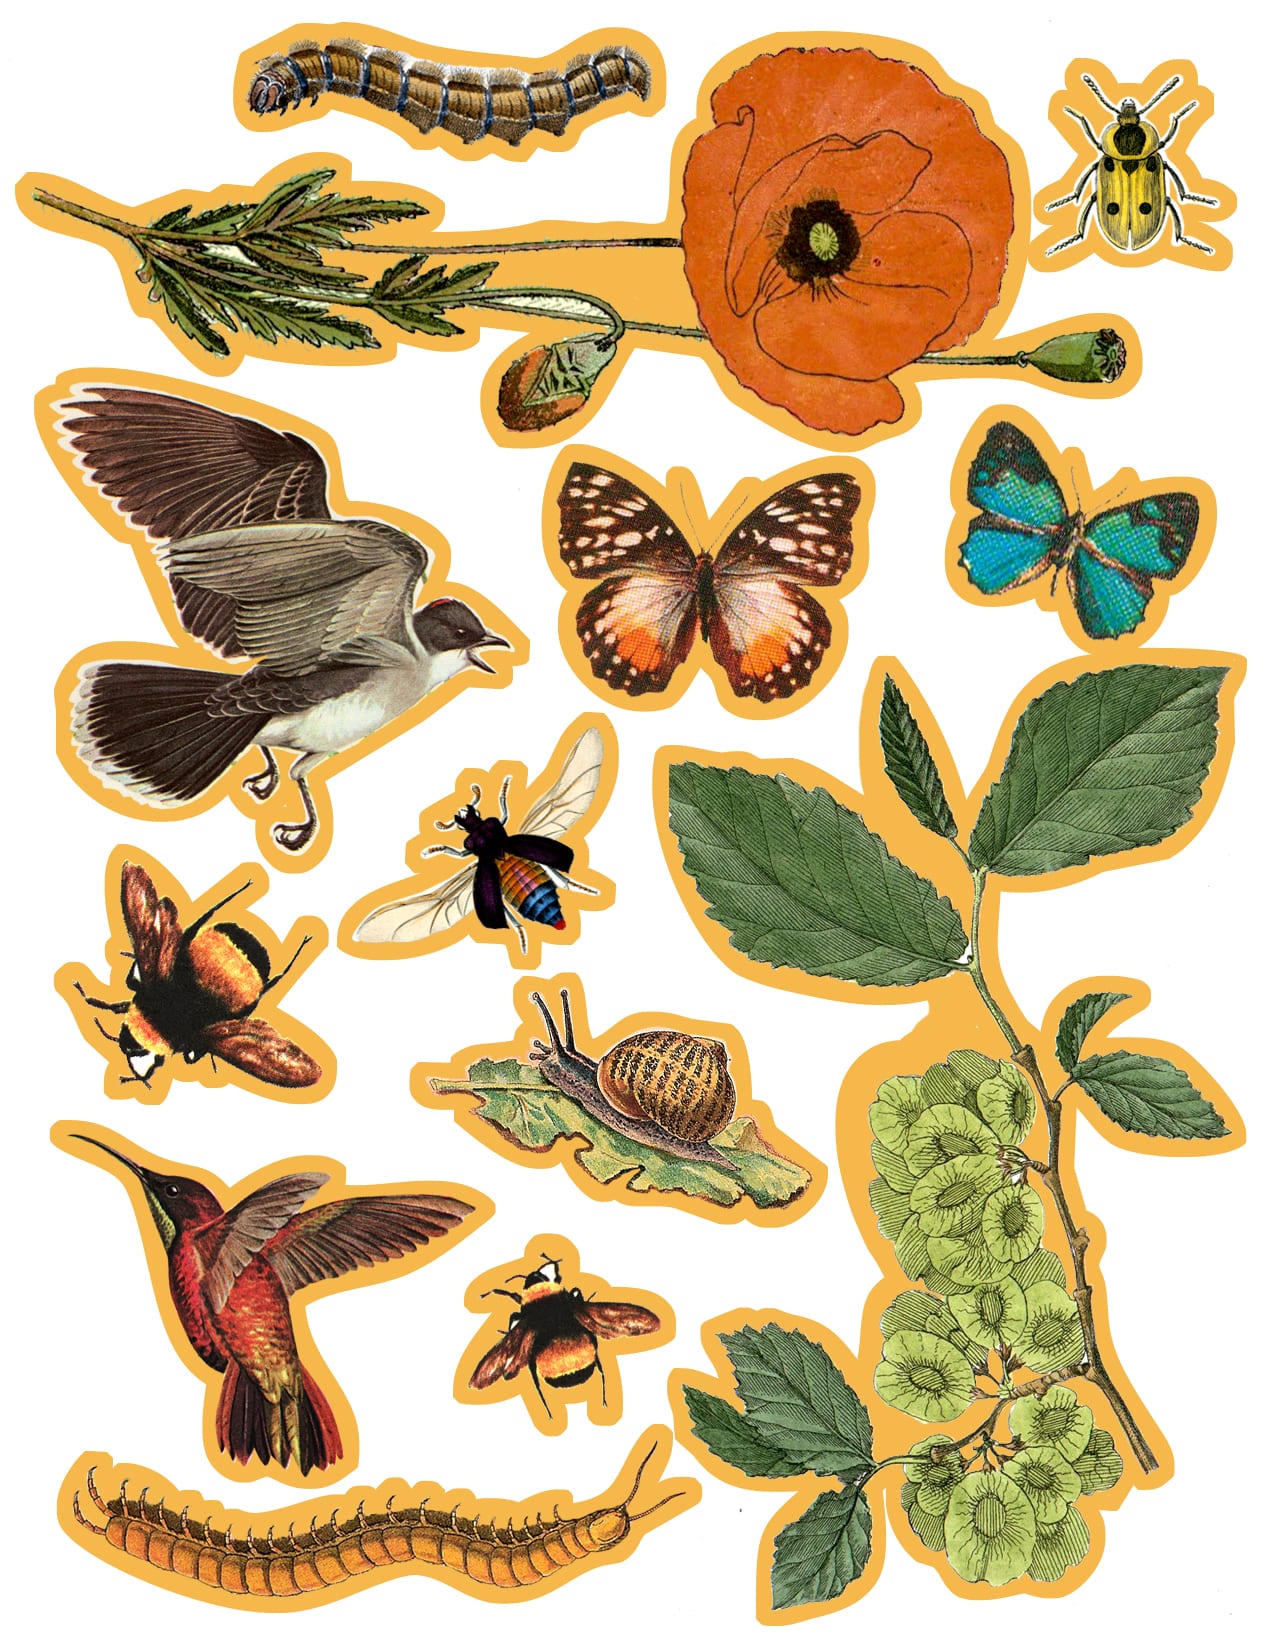
If you aren’t able to make a trip to the sanctuary, you can use this project at home with your kids to teach them about the beauty of the animals we see in our backyard and learn about what they do to help our world grow. We’ve made it extra easy for you by providing printable templates and step-by-step instructions below!
What you need:
- Pollinator Placemat Template
- 11″ x 17″ colored paper – blue, yellow, brown.
- Scissors
- Glue
PRINT the pollinator placemat template.
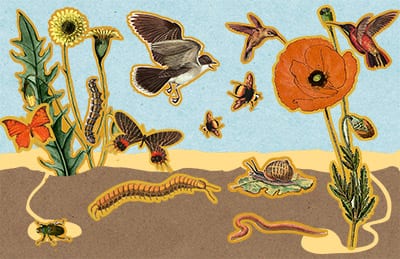
MAKE your pollinator placemat background:
- USE blue paper that is 11″ x 7″ in size as the base.
- TEAR a piece of yellow 11″ x 17″ size paper in half, horizontally.
- PASTE one half of the yellow paper onto the background. Line up the flat edges so that the background is still 11″ x 17″ in size.
- TEAR a piece of brown 11″ x 17″ size paper in half, horizontally.
- CREATE burrows for your insects to live in by CUTTING shapes into the brown paper.
- PASTE your brown paper ON TOP of the yellow paper to complete your background.
CUT the flowers, insects, birds and butterflies out of your template.
ORGANIZE the images onto your background, remembering to place some insects in their burrows.
PASTE the images down to complete your placemat.
Children may choose to add more pollinators or flowers to their placemat. Encourage them to use photographs, images from magazines, or pictures they’ve drawn themselves.
LAMINATE the placemat! If you have a laminating machine do it yourself, or take it to your local Fedex Office and have them laminate it for you.
Click the template below to download and print »
