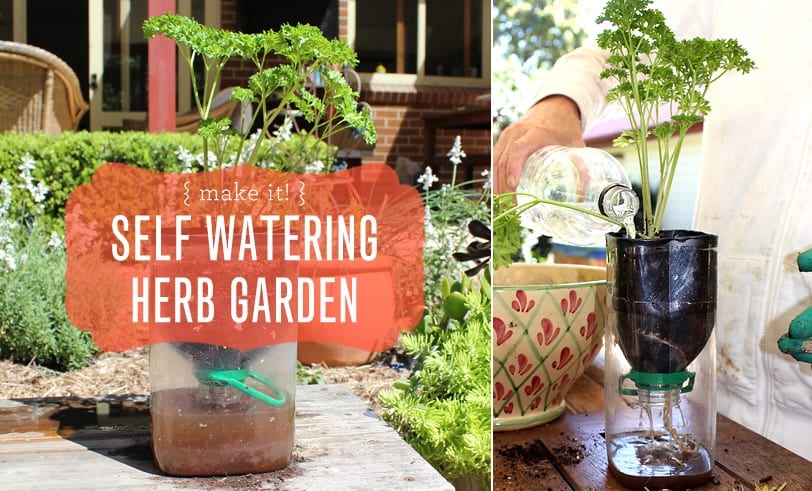
REUSING OUR PLASTIC: SELF-WATERING HERB GARDEN
This project is an easy answer to a windowsill herb garden. Herb gardens like a lot of sunshine, with the combination of sun and slightly lean soil causing the oils, the fragrance and the flavor of the herbs to intensify. PLUS this project just needs a few of those plastic containers from your recycling bin!
Regularly watering your plant is important, as is good drainage. The self-watering garden ensures that the soil stays moist but not overly wet and the plastic opening allows for water to pass straight through. Keep it to one herb per bottle as the plant needs room to grow and spread.
The kitchen might be the best windowsill for your herb garden (assuming it gets light!) as it is in an easily accessible spot to constantly pinch leaves and use them regularly. Picking from the herb helps to send out new growth and keep the plant going.
Liz likes to plant green herbs in her garden, like lettuce, spinach and parsley, making them easily accessible and ready to use at lunch time. She shows us how to keep parsley on hand and right at our fingertips:
WHAT YOU NEED:
- One plastic bottle – we used a flat-bottomed apple juice bottle
- Seedling – we used parsley
- String
- Duct Tape
- Scissors
- Potting Soil – we like Organic Mechanic
- Mesh Material – we used fly screen material
DIRECTIONS:
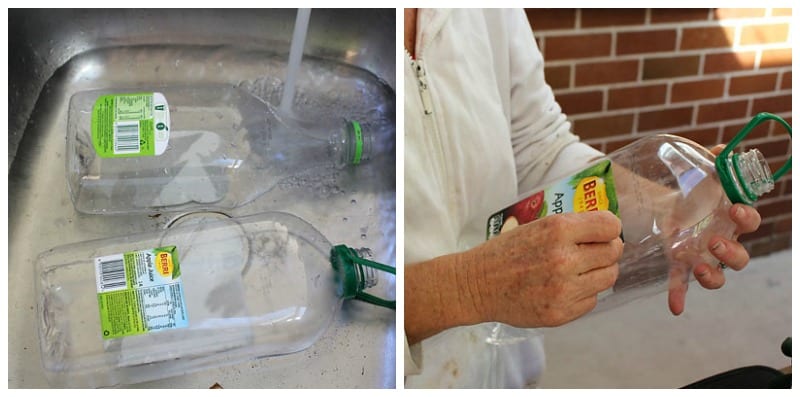
SOAK your plastic bottle to help make the labels easier to remove.
REMOVE the labels on either side of your bottle. We have an easy recipe for natural goo-gone to help take away the sticker adhesive >> (LINK: http://moomah.com/themagazine/natural-cleaners)
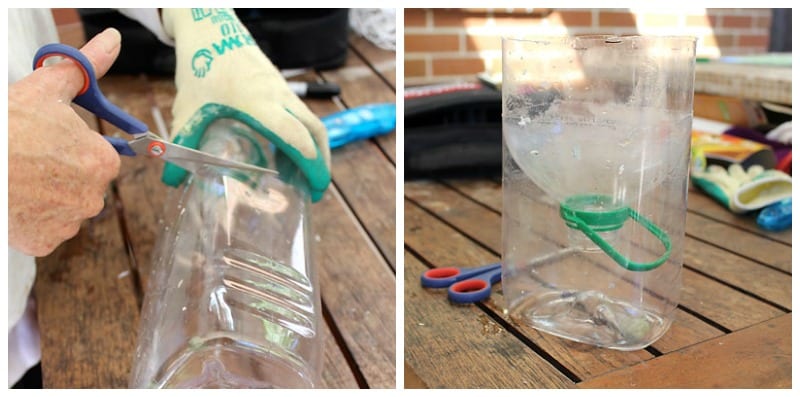
CUT the bottle horizontally, leaving the bottom 3/4 of the bottle standing and the remaining top 1/4 cut loose.
PLACE the top of the bottle where the lid used to sit into the remaining bottle, upside-down. The lid opening should be facing the bottom of the bottle.
CUT a strip of duct tape and LINE the edge of the bottle with tape. This will stop the plastic edge from being sharp.

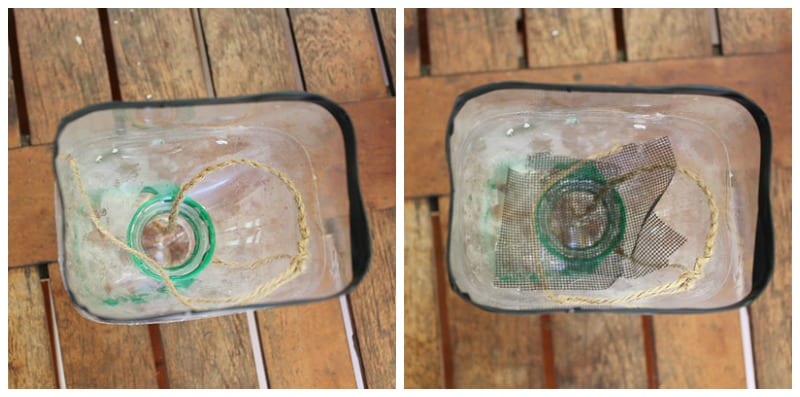
TAKE a piece of string and place it in the opening of the bottle. Make sure it is long enough to reach the bottom of the bottle and tall enough to come out of the top.
The string will act as a watering agent. It will help to transfer water from the bottom of the bottle to the soil at the top, keeping the soil moist.
CUT a square piece of mesh material and LAY it along the lid opening.
The mesh acts as drainage, preventing the soil from falling through to the bottom while still allowing the water to drain.
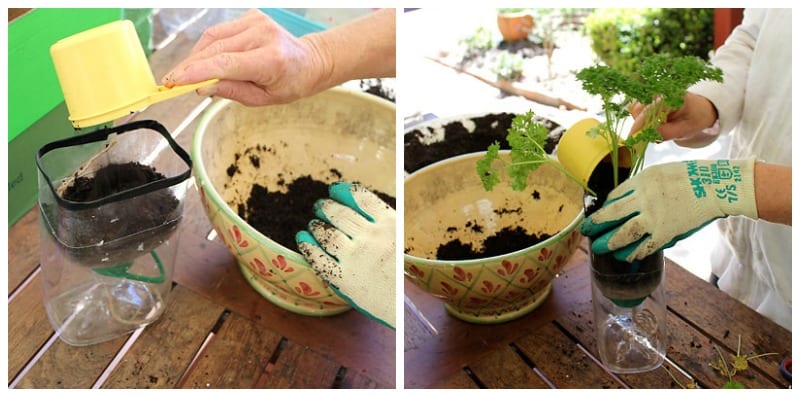
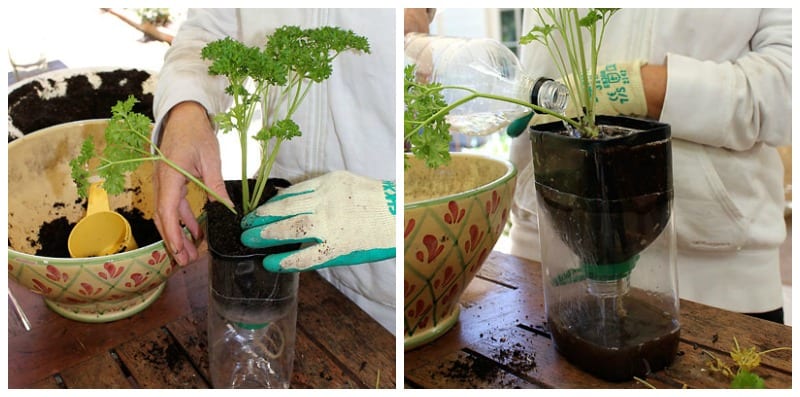
POUR potting mix into the opening of your container, filling it almost completely to the top of the container.
TRANSPLANT your seedling into the potting mix.
WATER your seedling, making sure to test the draining system and watch as the water passes through the soil to the bottom of the container.
DISPLAY your herb garden on your windowsill, allowing it to receive lots of nice light.
REMEMBER to pick from your herb garden often to help it grow and sprout healthy new leaves.
CLICK HERE TO FIND MORE WAYS TO REUSE PLASTIC >>

JOIN OUR EMAIL LIST
Sign up to get updates fromHey Friend Foundation